Overview
Jupyter Notebooks are documents which can combine executable code, formatted text, and interactive graphics into a single file. Because Notebooks can be shared, they provide developers with a tool for capturing and explaining their computational results. To use a Jupyter Notebook, a web application, such as JupyterLab, is needed.
We now provide a web portal where JupyterLab can be accessed on Rivanna and Afton.
However, to use JupyterLab, you must have an account on UVA HPC.
Accessing JupyterLab
To access JupyterLab, you will begin by connecting to our Open OnDemand portal:
- Open a web browser and go to https://ood.hpc.virginia.edu.
- Use your
Netbadge credentials to log in.
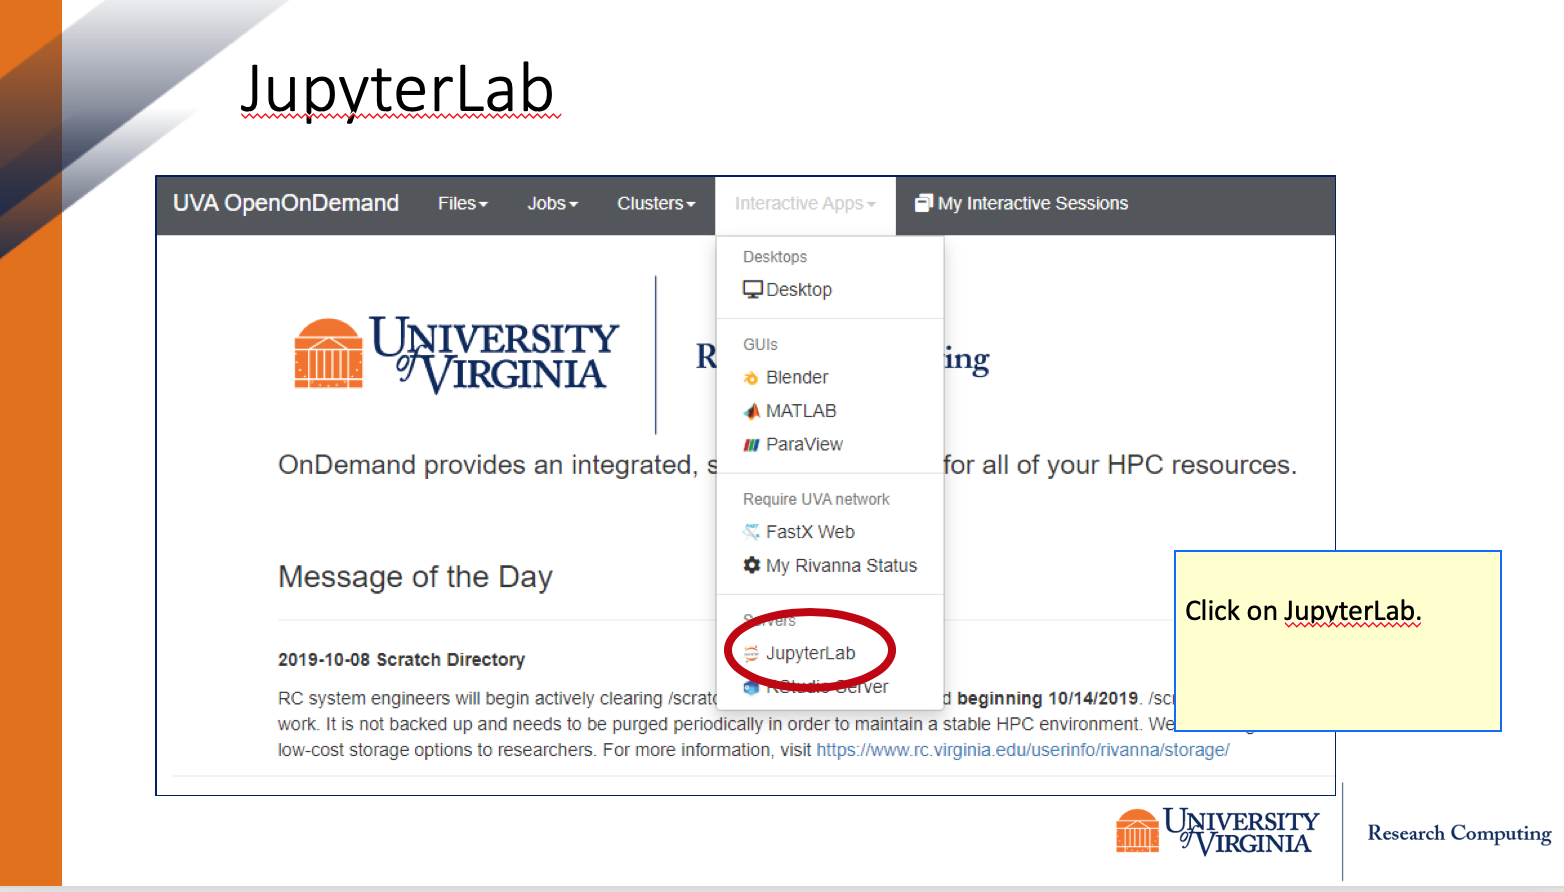
- On the top right of the menu bar of the Open OnDemand dashboard, click on
Interactive Apps.
- In the drop-down box, click on
JupyterLab.
Requesting an Instance
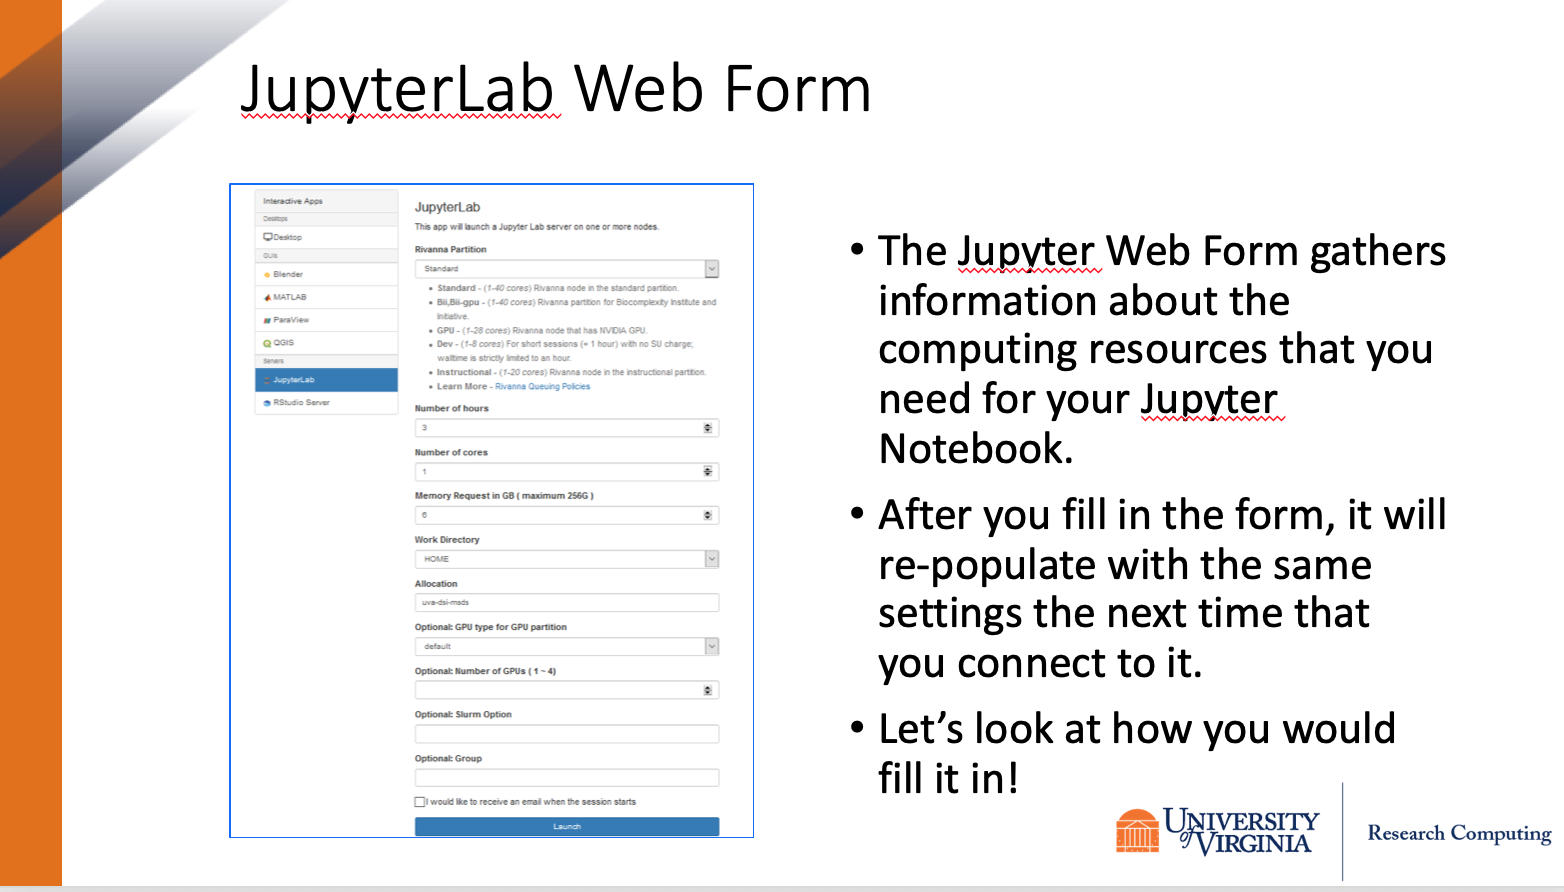
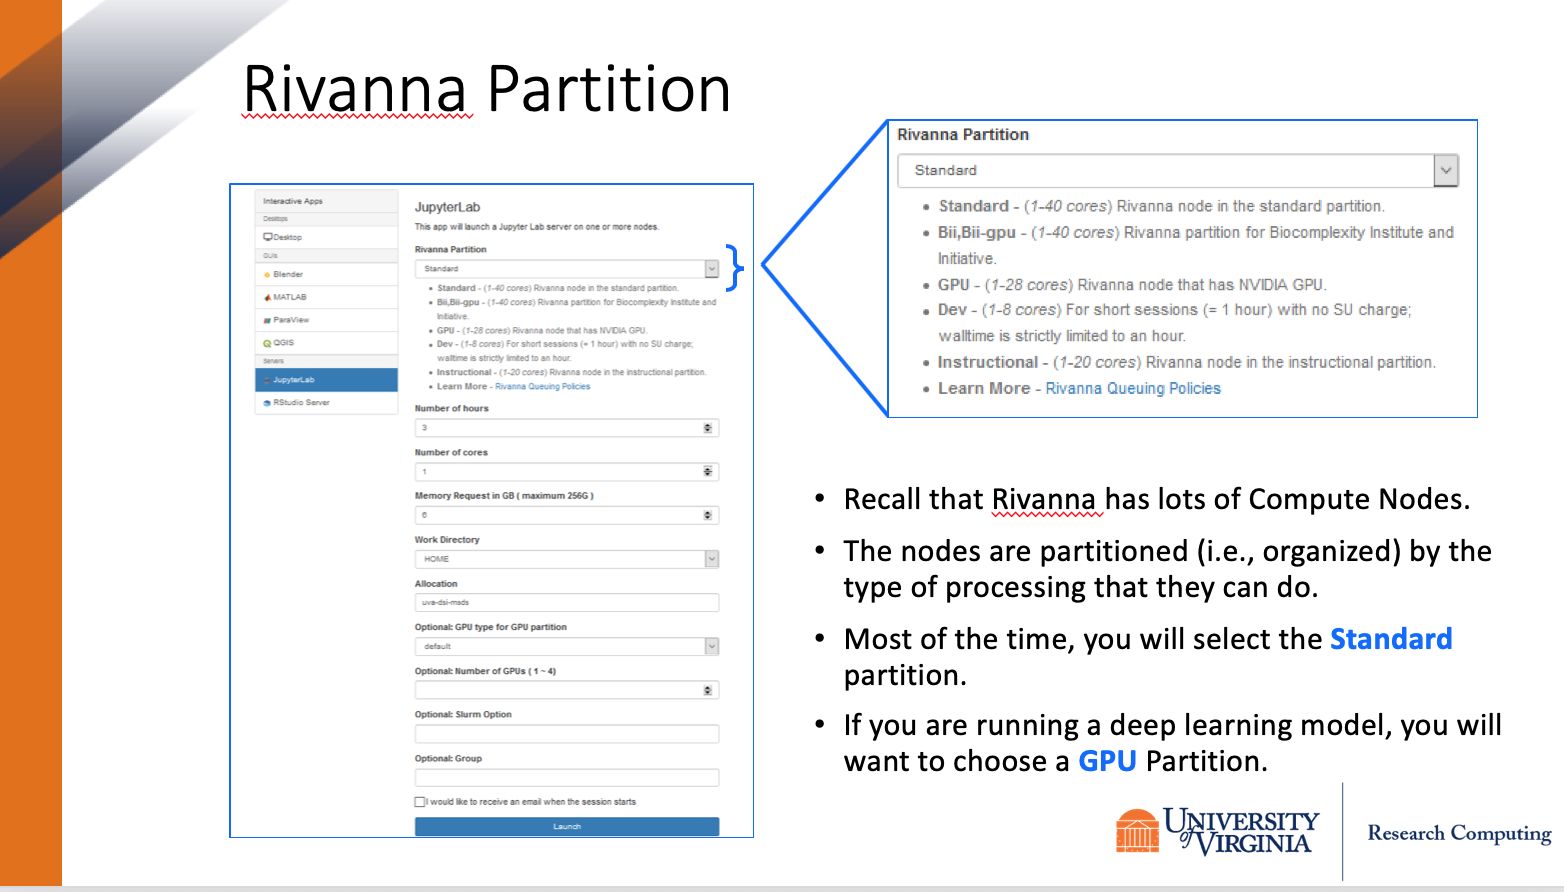
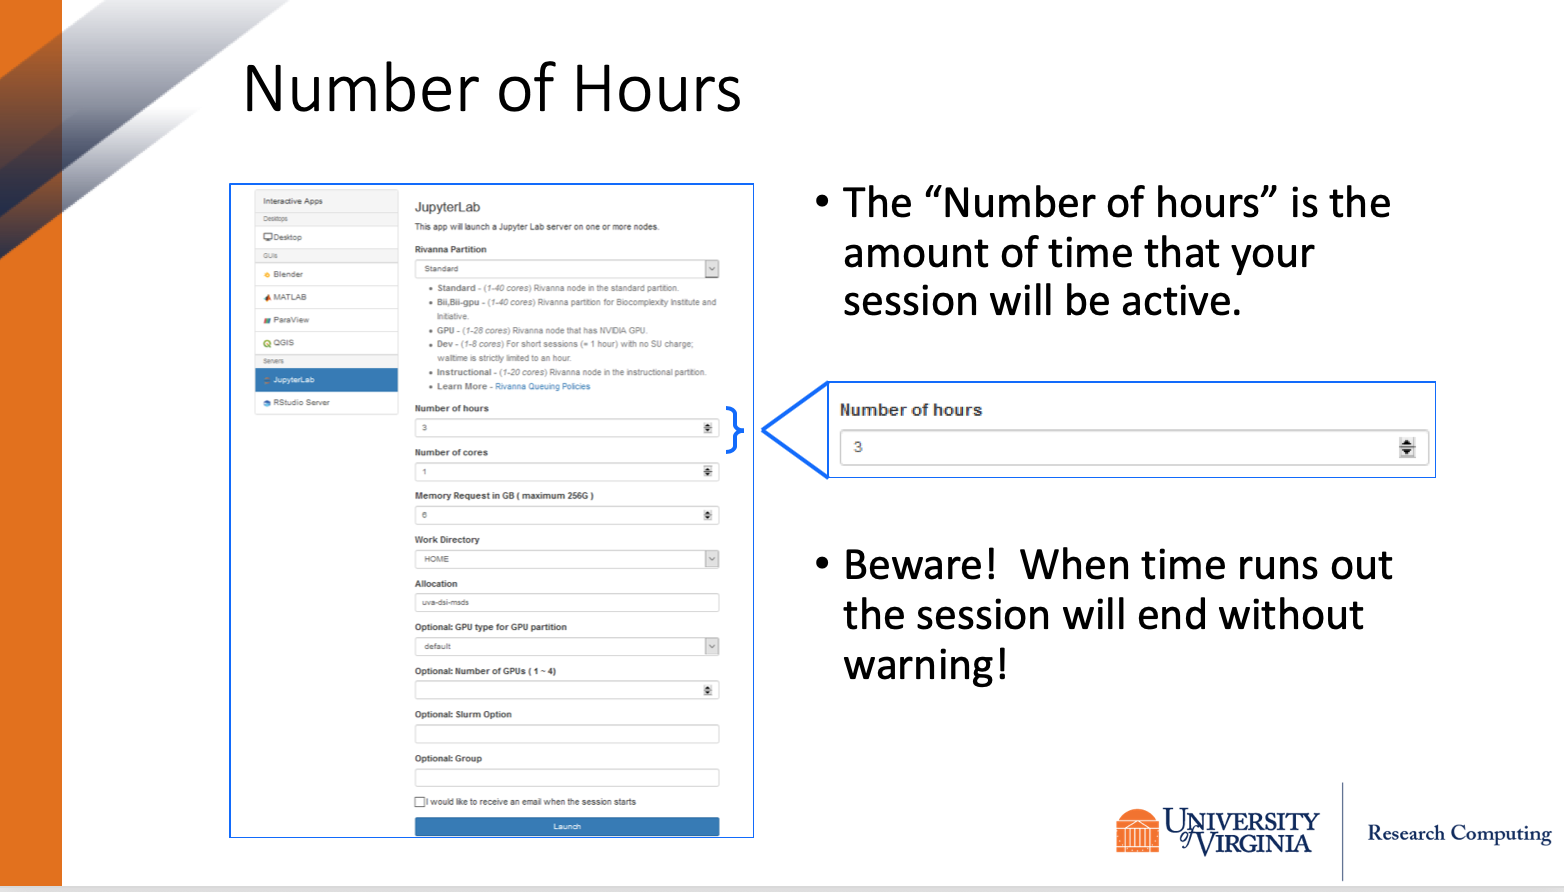
Your instance (or copy) of JupyterLab will run on a compute node. So it will need a list of resources, such as partition, time, and allocation. If you are new to UVA HPC, you may want to read the HPC User Guide to learn more about the partitions.
- After connecting to JupyterLab through Open OnDemand, a form will appear where you can fill in the resources for JupyterLab.
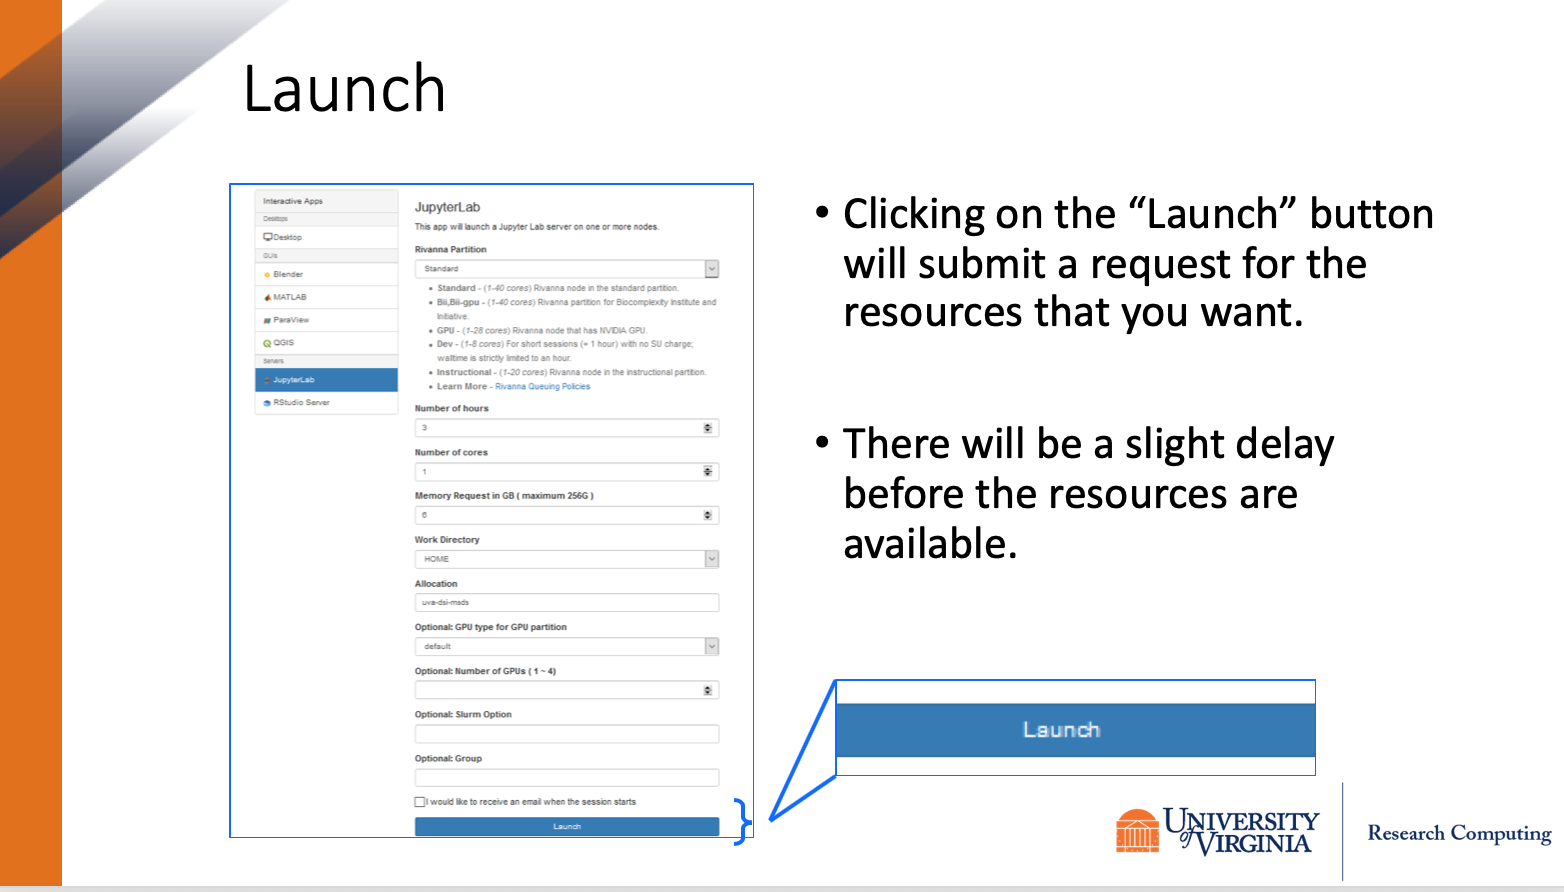
- When done filling in the resources, click on the blue “Launch” button at the bottom of the form.
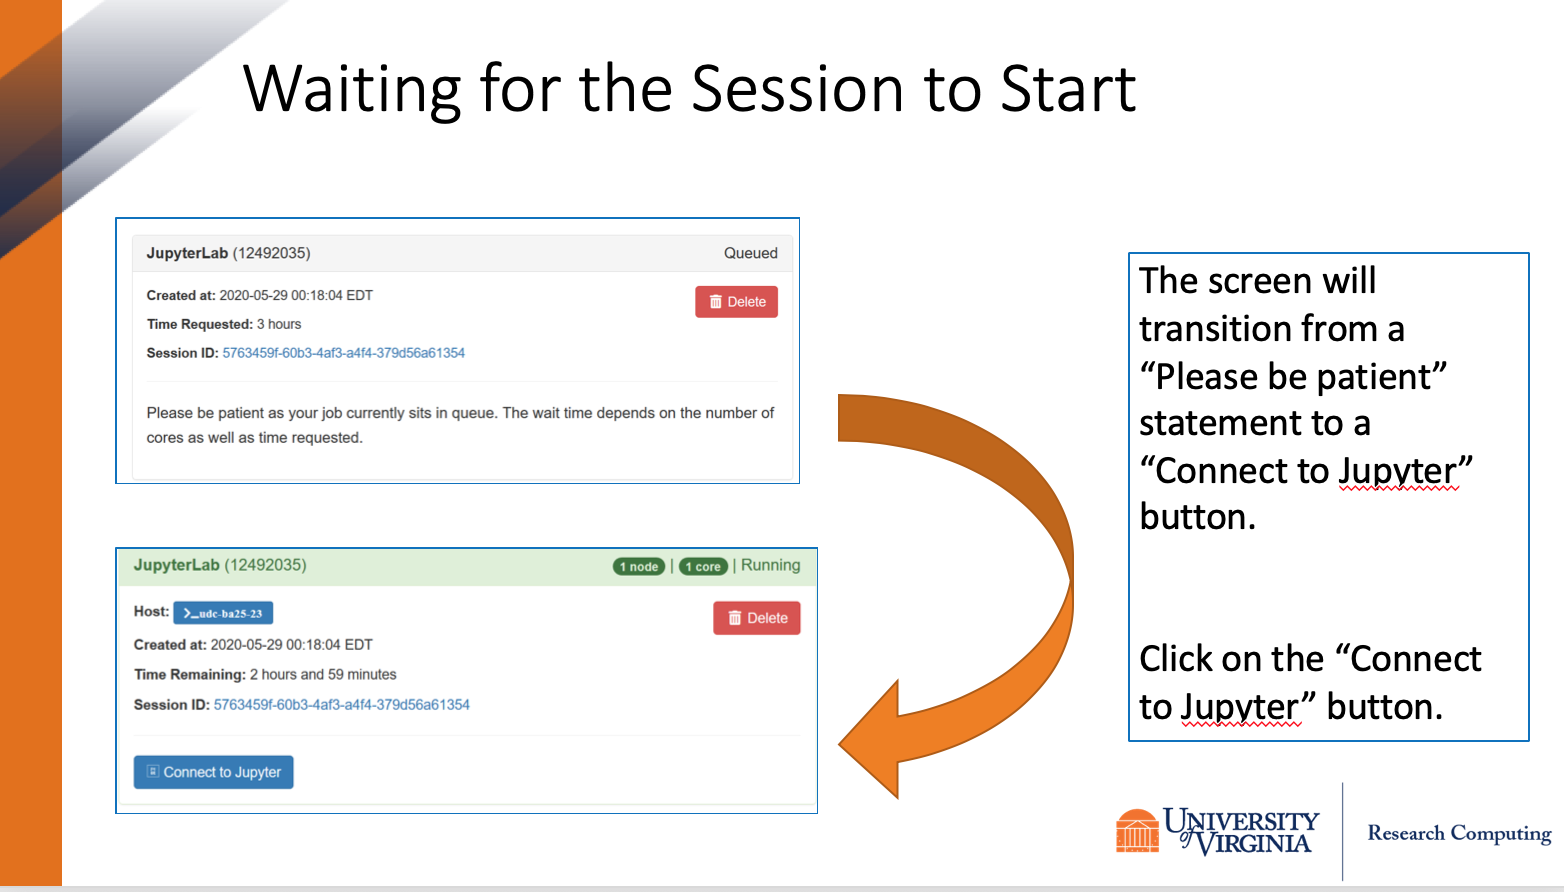
- It will take a few minutes for the system to gather the resources for your instance of JupyterLab. When the resources are ready a
Connect to Jupyter button will appear. Click on the button and the Notebook session will open in a new tab.
The following screenshots illustrate the sequeunce of steps decribed above.
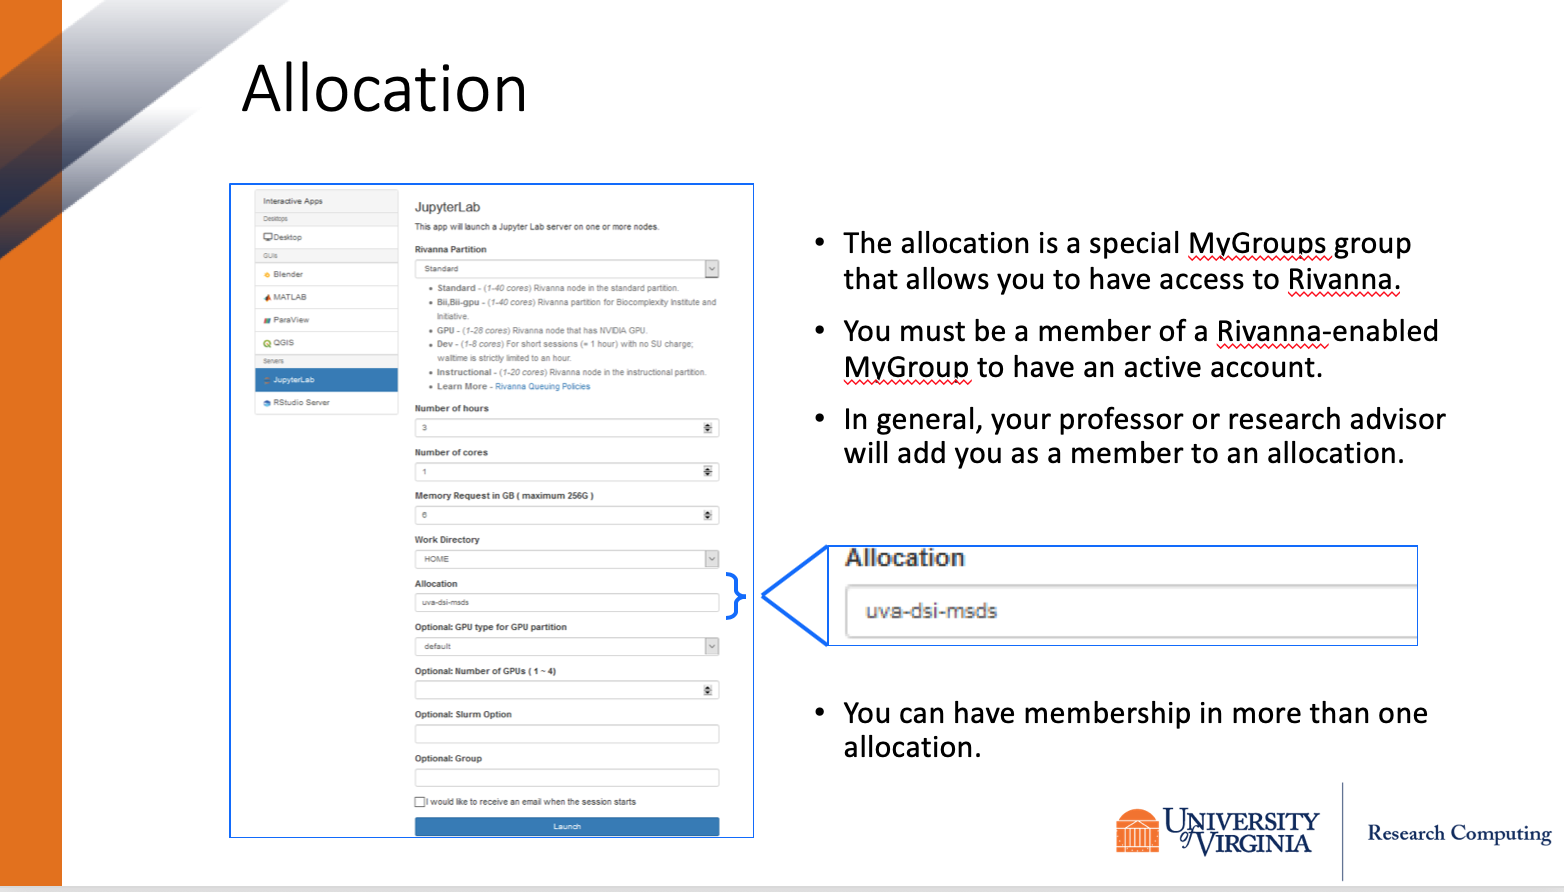
Note that under the Work Directory field, the drop-down menu allows you to choose
either your HOME or SCRATCH directories.
Running Notebooks
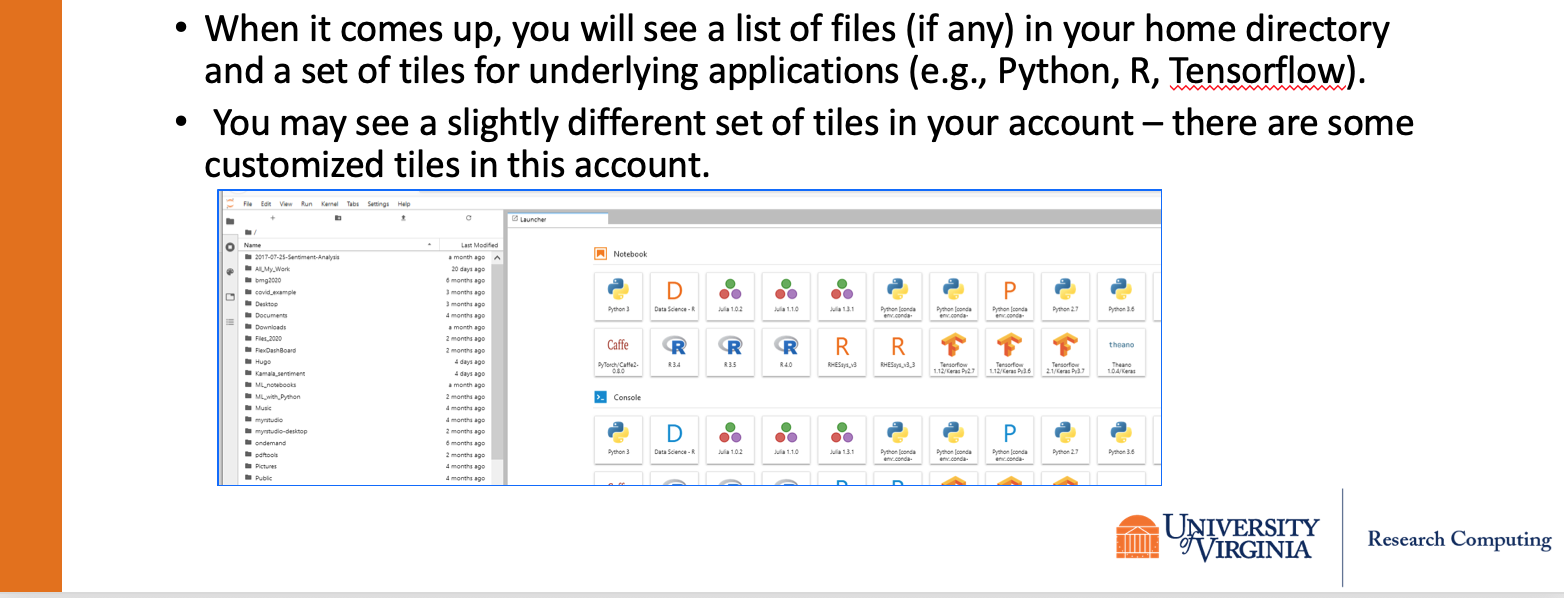
The JupyterLab dashboard will have two panes:
- A file browser pane on the left where you will see the files and folders in your HPC directory; and
- A
Launcher pane on the right with tiles for the available kernels (i.e., underlying software that will run the code in your Notebooks).
If you already have a Jupyter Notebook in your account, you can maneuver to the file in the file-browser pane, and double-click on the file name to open the Notebook.
However, if you want to create a new Notebook, go to the Launcher pane and click on the tile for the desired kernel (e.g., Python 3).
If you are more familiar with the classic Notebook environment, you can change the JupyterLab format by clicking on Help and select Launch Classic Notebook.
Extensions
We provide the following JupyterLab extensions:
- plotly is an interactive plotting library
- jupyterlab-dash renders Plotly Dash apps as a separate window in JupyterLab
- jupyterlab-toc auto-generates a table of contents in the left area
- voila allows you to convert a Jupyter Notebook into an interactive dashboard
JupyterLab on Rio
Access
Connecting to JupyterLab through OOD on Rio is similar to the standard security zone (Rivanna/Afton). You’ll begin by connecting to your Linux VM. On the top right of the menu bar of the Open OnDemand dashboard, click on “Interactive Apps”, then click “JupyterLab” in the drop-down box. You may be prompted to enter your credentials (computingID and EServices password) each time you need each time a new notebook file, kernel, or JupyterLab session is selected. Other than this, above instructions should be followed. More information regarding Rio’s partition and systems details are outlined here.
Conda Environments and Custom Kernels
Inside of the JupyterLab terminal, conda needs to be loaded with Miniforge module (Eg module load miniforge). Environments are created under /standard/ivy-xyz-xyz/<computingID>/.conda/envs, where ivy-xyz-xyz is the name of your project, and <computingID> is your computing ID.
Conda environments created outside of OOD JupyterLab (Eg OOD Clusters>HPC shell access, or through ssh) can still be accessed if instructions here are followed.
Kernels can be created in the OOD JupyterLab terminal and associated files are written to /standard/ivy-xyz-xyz/<computingID>/.local/share/jupyter/kernels .
FAQ
How to create custom JupyterLab kernels?
Please refer to our how-to.
How do I load a module in JupyterLab?
That is not possible if you request a JupyterLab session. Please refer to our how-to for a workaround.